
Taking screenshots of module parameters in Joomla
29 Aug 2011 - Written by Matthew Hayashida
Posted in Tutorials
Have you ever needed a simple way to provide your clients or users with a screenshot of all the preference panels in a module, menu, or content item? With this little trick you can quickly and easily provide screenshots for support, user documentation, or personal reference.
Here's how you can:
- Time Required: 5 minutes
- Skills: Basic
- Tools: FTP client, Screen capture utility
- Joomla Version: This tutorial demonstrates the process with Joomla 1.5, but the process is exactly the same in Joomla 1.7.
Step by step process.
1. This involves temporarily renaming the javascript files responsible for the accordion layout so the page displays all the preference panels at once.
-
Navigate to Extensions > Module Manager because the next step will temporarily disable the backend menus.
-
Login to your site through an FTP client. Locate the javascript folder at YOUR_JOOMLA_SITE_ROOT/media/system/js/
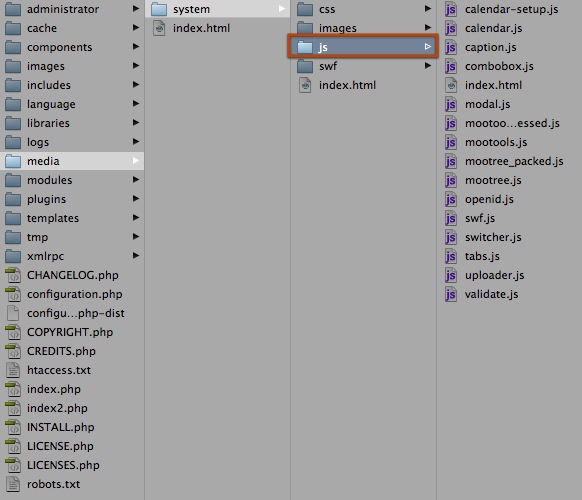 4. Rename the 'js' folder. The name you choose doesn't matter. I personally use a name like 'jshidden'. Leave your FTP window open, you'll need to change the folder name back in a minute.
 -
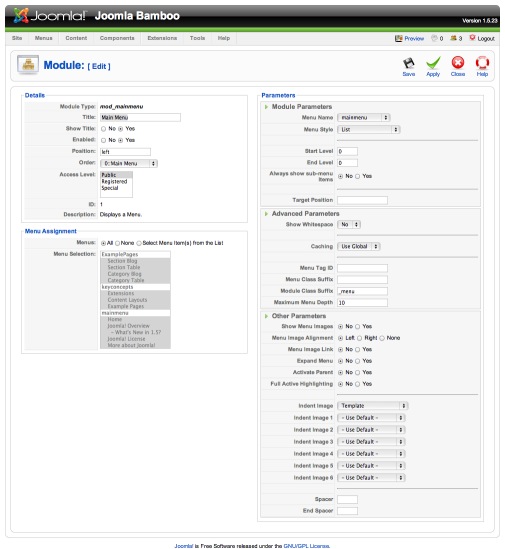
Back in your browser, edit the item whose preferences you want to capture. You may need to refresh the page a couple times to clear the cached version of the javascript that enables the accordion. You will notice that all the module preference panels are expanded:
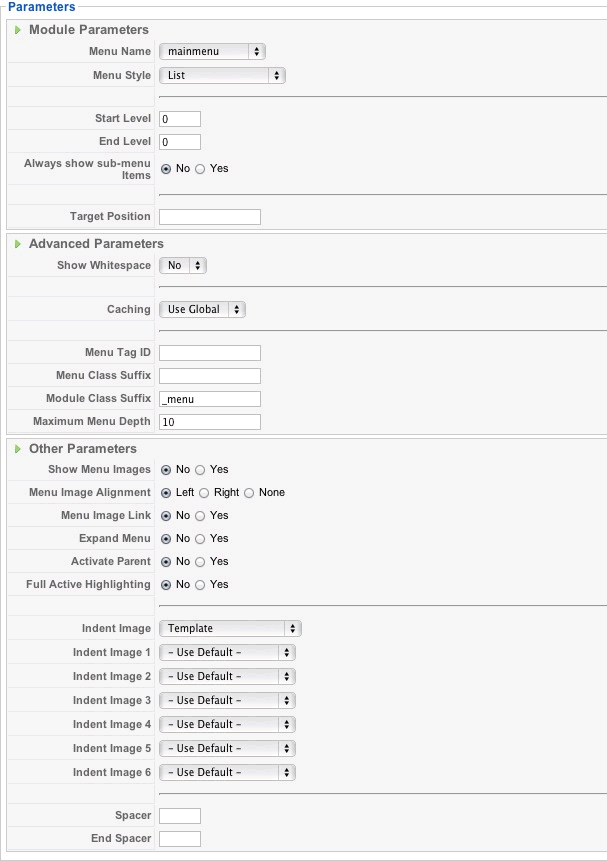
 6. Using a screenshot utility, select the now expanded preference panels. You will end up with a nice, simple image of all your settings.
*Note about screenshot tools: Some tools like Littlesnapper (Mac only), which I use and recommend, allow for easy selection of whole HTML elements. This is handy when trying to capture a module like Microblog that has very long preferences that don't all fit on the screen.
 7. Go back to your FTP client and revert your renamed javascript folder back to 'js'. In my case I am renaming 'jshidden' to 'js'. Refresh your site and confirm that everything functions properly.